How to Tell If Your Brake Rotors Are Bad Before a Track Day
If your rotors are cracked, heavily heat-checked, below minimum thickness, or show pedal pulsation that worsens under braking, treat them as no-go before a track day. Bad rotors can lengthen stopping distances, knock the pads back, and fail when brake temperatures climb. This guide gives you a fast inspection checklist and a clear go/no-go call.
Track-day rotor checklist
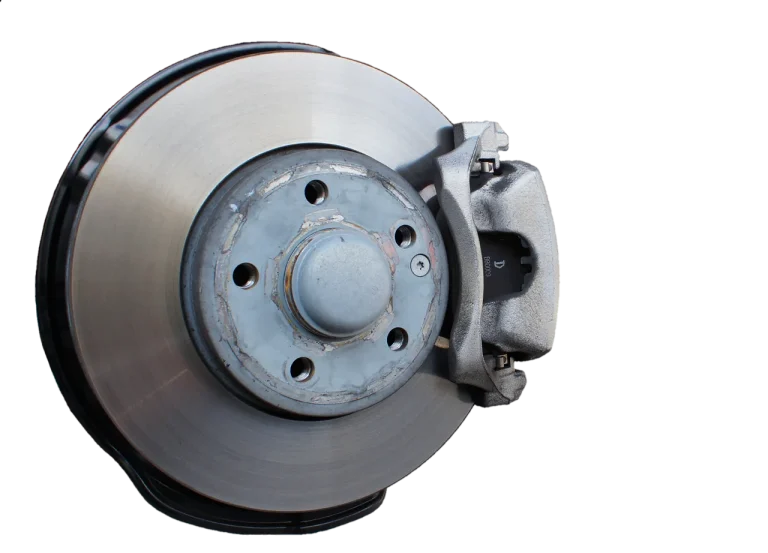
Before you load the car, pull the wheels and inspect the rotors with your hands, your eyes, and a micrometer. A quick look is not enough for track use, because a rotor can appear fine and still be too thin, cracked, pitted, or heat damaged for repeated high-temperature laps.
| Symptom | What it likely means | Can the car go to the track? | What to measure or inspect first |
|---|---|---|---|
| Squeal at low speed | Often the pad wear indicator touching the rotor | Maybe, only after pad thickness and warning light checks | Inspect pad material, wear tab, and brake warning light |
| Grinding noise | Metal-on-metal contact or pad backing plate contact | No | Inspect pads and rotor face for damage before driving hard |
| Steering wheel vibration during braking | Front rotor warpage or uneven thickness | No, until verified | Measure front rotor thickness with a micrometer and inspect for cracks |
| Seat or pedal vibration during braking | Rear rotor warpage or uneven thickness | No, until verified | Measure rear rotor thickness with a micrometer and inspect both faces |
| Light scoring | Minor wear or pad imprint on many street-driven rotors | Often yes, if thickness is healthy and no cracks are present | Check groove depth and confirm the rotor is still above minimum thickness |
| Deep grooves you can catch a fingernail in | Severe scoring, possible pad wear issue, or metal-to-metal damage | Usually no | Inspect pad thickness and compare rotor thickness to the stamped minimum |
| Rust pitting | Corrosion from sitting unused, sometimes enough to weaken track confidence | Usually no for repeated high-heat laps | Inspect the pitted area closely and measure thickness in several spots |
| Bluish discoloration | Sign of extreme heat exposure | Only with caution after a full inspection; often no | Inspect for heat checking, cracks, and thickness loss |
| Cracks or heat checking that keeps spreading | Track-risk damage from repeated heat cycles | No | Replace the rotor before hard braking laps |
| Rotor at or near minimum thickness | No safety margin for sustained track heat | No | Compare the stamped minimum on the rotor to a micrometer reading |
What the checklist is really asking you to decide
The question is not “Does the rotor look bad?” The question is whether the rotor still has enough thickness, surface integrity, and heat tolerance to survive repeated braking from track speeds. Healthy rotors are often about 1–2 mm above the stamped minimum thickness, which is commonly treated as the safety cutoff. Once a rotor is near that number, it is not track-ready.
Say your front rotors show a few shallow marks and the pads still have material left. That can be fine for a street commute, but track use changes the equation because heat can turn a borderline rotor into a failure point fast. The same rotor may be fine for a short drive and wrong for a session of repeated hard stops.
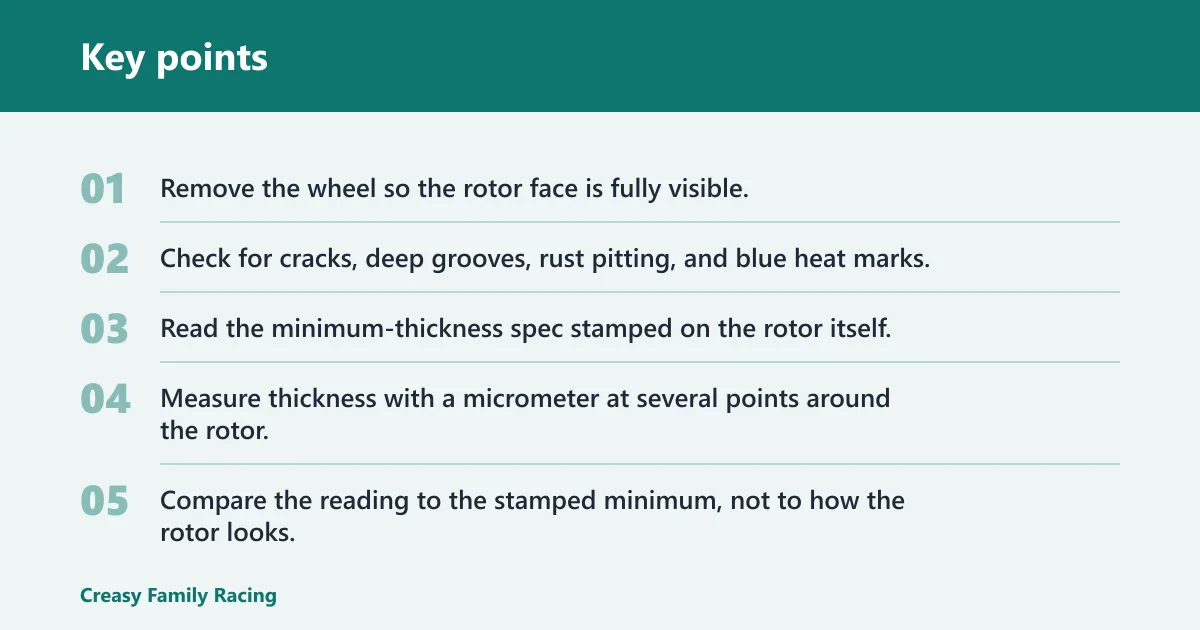
- Remove the wheel so the rotor face is fully visible.
- Check for cracks, deep grooves, rust pitting, and blue heat marks.
- Read the minimum-thickness spec stamped on the rotor itself.
- Measure thickness with a micrometer at several points around the rotor.
- Compare the reading to the stamped minimum, not to how the rotor looks.
- Check pad thickness, the wear indicator, brake pedal feel, and the brake warning light.
- Only clear the car for track use if the rotor has healthy thickness and no track-level damage.
What does rotor scoring mean?
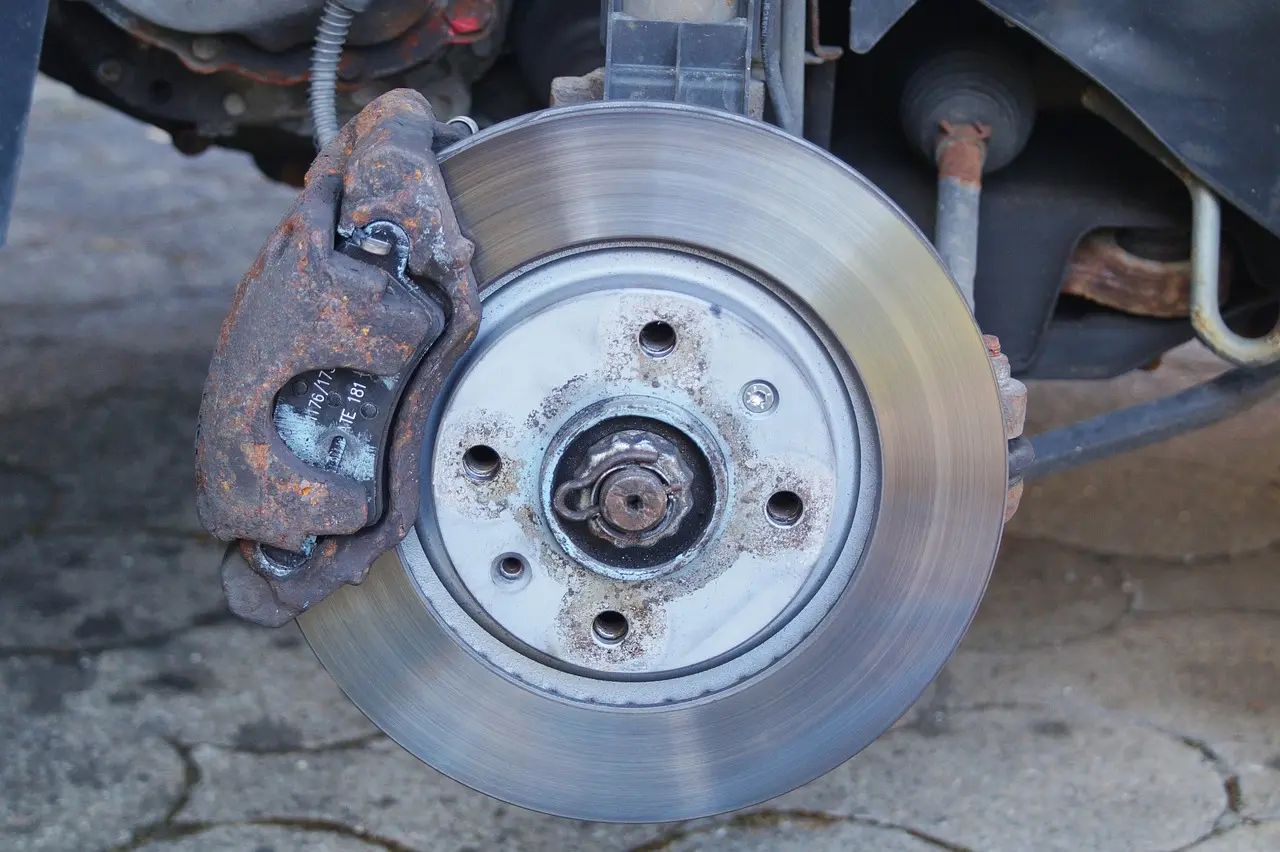
Rotor scoring is the set of grooves or marks left on the braking surface. Light scoring can be normal on a used rotor, especially if the pads have picked up dust or small debris. Deep grooves you can catch a fingernail in are different. Those grooves can point to worn pads, embedded debris, or metal-to-metal contact, and they deserve a hard stop before track use.
Light marks versus deep grooves
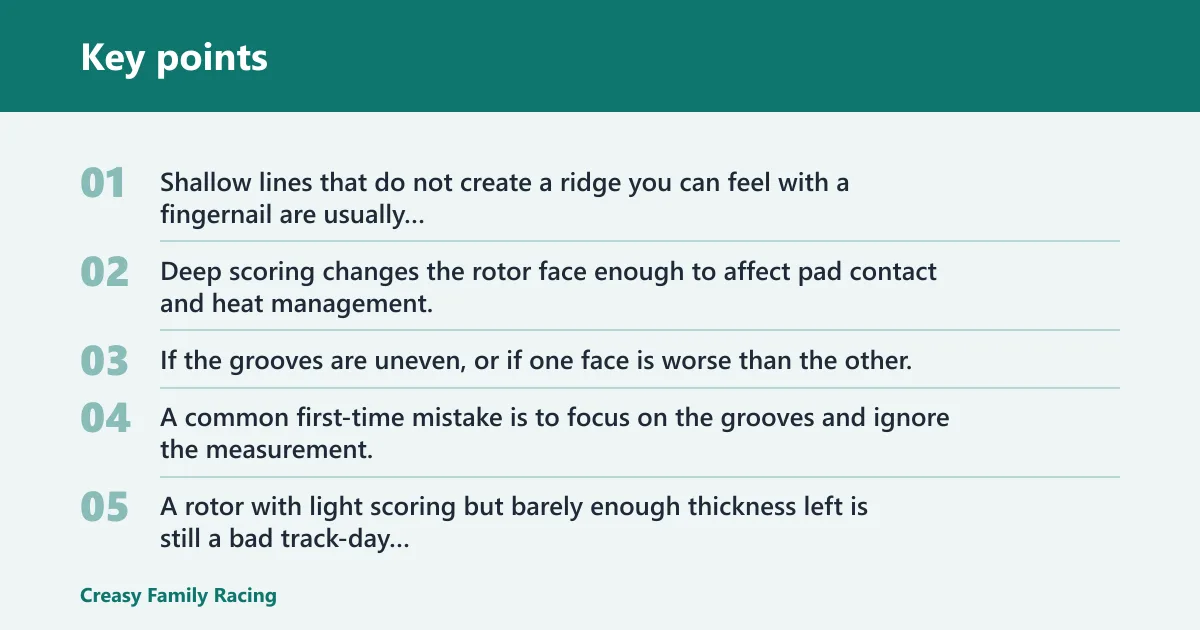
Shallow lines that do not create a ridge you can feel with a fingernail are usually cosmetic or mild wear. Deep scoring changes the rotor face enough to affect pad contact and heat management. If the grooves are uneven, or if one face is worse than the other, inspect pad wear and rotor thickness before you assume the rotor can survive repeated laps.
A common first-time mistake is to focus on the grooves and ignore the measurement. A rotor with light scoring but barely enough thickness left is still a bad track-day candidate, because the heat load is the real test.
When scoring becomes a no-go
If scoring is deep, uneven, or paired with grinding noise, treat the rotor as suspect. That is especially true if the pads are low or the rotor face shows signs of heat damage. For track use, deep grooves are a sign to replace the rotor rather than hope a session will smooth things out.
Is brake vibration a rotor problem?
Brake vibration during deceleration often points to rotor thickness variation, warpage, or heat-related surface changes. Front rotor warpage is usually felt in the steering wheel. Rear rotor warpage is usually felt in the seat or pedal. If the vibration grows under repeated braking, track heat may be making an existing rotor problem worse.
Front vibration in the steering wheel
When the steering wheel shakes under braking, the front rotors are the first place to inspect. Measure thickness with a micrometer and compare both sides of the rotor. A rotor can also develop heat spots or uneven deposits that feel like warpage, so do not stop at a visual check.
Rear vibration in the seat or pedal
Rear rotor issues often show up as vibration through the seat or brake pedal instead of the steering wheel. That can be easy to miss if you only test the car on a quiet street. For track-day triage, rear vibration matters just as much as front shake, because rear brake instability can still disrupt braking control.
Recurring vibration under repeated braking
If the vibration fades after one stop and returns under the next hard stop, heat is part of the problem. That pattern is a warning that the rotor may not tolerate repeated high-energy laps. Track days punish weak rotors far faster than street driving does.
How do you verify rotor thickness?
Verify rotor thickness by reading the minimum spec stamped on the rotor itself and measuring the rotor with a micrometer. Do not guess from appearance. The micrometer reading, taken with the wheel removed, is the check that tells you whether the rotor is still above the safety cutoff for track use.
Read the stamped minimum, then measure
The minimum thickness is stamped on the rotor itself. That number is the non-negotiable cutoff. A rotor can still look smooth, clean, and straight while being too thin to handle track temperatures safely.
Use the micrometer on several points around the rotor face, not just one spot. If the rotor is close to minimum, the margin is too small for repeated hard braking, even if the car feels fine on the street.
Why a near-minimum rotor is not track-ready
Track driving adds heat, and heat reduces your margin. A rotor that is already near minimum has little reserve if it starts to wear faster during a long session. Healthy rotors are often 1–2 mm above minimum thickness, which gives more cushion, but the stamped minimum remains the cutoff.
Heat damage and rust pitting
Bluish discoloration on a rotor is a visible sign of extreme heat. On a street car, that may mean one hard event. On a track car, it can mean the rotor has already been pushed into a temperature range that deserves a close inspection for cracks, heat checking, and thickness loss. Rust pitting is common on cars that sit unused for long stretches, and it can become a serious concern before repeated high-heat laps.
Bluish discoloration after hard braking
Blue or blue-gray patches are not normal wear marks. They tell you the rotor has seen extreme heat. If the discoloration is paired with vibration, cracking, or a rough surface, do not treat the rotor as ready for a track day.
Rust pitting on a car that sits
Rust pitting can start after long storage and may look harmless at first. For ordinary driving, light corrosion may wear down gradually. For a track day, pitted areas can become hot spots and crack starters under repeated braking. Inspect the full braking surface, not just the outer edge.
Suppose a car has been parked for months and the rotors now show orange rust and a few rough pits near the swept area. That rotor might still stop the car on the street, but it is a poor bet for repeated heavy braking where heat cycling can turn surface damage into a larger failure.
Can bad pads look like bad rotors?
Yes. Pad problems can sound and feel like rotor problems early on, which is why you should check pads, the wear indicator, brake pedal feel, and the warning light along with the rotors. A squeal can come from a pad wear indicator, while a soft or spongy pedal can point to fluid or hydraulic issues that need diagnosis before hard driving.
Pad wear indicator squeal
A small metal wear tab is designed to make noise when pads get thin. That squeal can be mistaken for rotor trouble, but the first move is to inspect pad thickness. If the pads are near the end of their life, the noise may be telling you more about pad wear than rotor damage.
Soft pedal and warning light checks
A soft or spongy pedal is not a rotor symptom by itself. It can point to fluid, air, or hydraulic problems, and those need attention before a track day. The brake warning light can also indicate low fluid or low pad thickness, so it should be diagnosed before the car is driven hard.
When to replace rotors
Replace rotors before the track when cracks, heavy heat checking, deep scoring, rust pitting, or thickness loss leave too little safety margin. Resurfacing is only a possible choice when the rotor still has enough thickness after machining and no serious heat damage is present. If the rotor is close to minimum, replacement is the better call.
Cracks and heat checking
Cracks are generally a no-go for track use. Heat checking, which shows up as fine surface cracks or a crack pattern, can be the start of a larger failure under repeated braking. If the crack pattern is growing, or if the rotor has already seen blue heat marks, replace it rather than gamble on another session.
Resurface or replace?
Resurfacing can make sense when the rotor has mild scoring and enough material left to stay safely above minimum thickness afterward. Replace instead of resurfacing when the rotor is already near minimum, when pitting is deep, or when cracks and heat damage are present. For a track day, thickness margin matters more than a pretty face.
Frequently asked questions
How can I tell if my brake rotors are bad before a track day?
Look for cracks, heavy heat checking, deep grooves, rust pitting, blue discoloration, and vibration under braking. Then verify rotor thickness with a micrometer and compare it to the minimum stamped on the rotor. If the rotor is near minimum or shows repeated heat damage, do not take it to the track.
What rotor wear signs mean I should not go to the track?
Do not go if the rotor has cracks, deep scoring you can catch with a fingernail, rust pitting that looks severe, blue heat marks, or thickness at or near the stamped minimum. A vibration that returns under repeated braking is another warning that the rotor may not survive track heat.
Can I use rotors with grooves or scoring for a track day?
Light scoring may be acceptable if the rotor is still thick enough and the surface is otherwise sound. Deep grooves are not acceptable, especially if you can catch a fingernail in them or if the pad material is low. Track use turns marginal surfaces into heat-risk parts quickly.
Is brake vibration a sign of bad rotors or bad pads?
It can be either, but the location helps. Front vibration usually shows in the steering wheel, while rear vibration often shows in the seat or pedal. Check rotor thickness, pad wear, and whether the vibration worsens under repeated braking, because that pattern points toward a rotor heat issue.
How do I know if my rotors are below minimum thickness?
Read the minimum thickness stamped on the rotor and measure the rotor with a micrometer after removing the wheel. Do not trust appearance alone. If the measured thickness matches or falls below the stamp, the rotor is below the safety cutoff and should not be used for track driving.
What does rust pitting on brake rotors mean before a track day?
Rust pitting is common on cars that sit unused for long stretches, but it matters more before high-heat laps than before normal street driving. Light surface rust may clean up, yet deeper pitting can create hot spots and weak points. Inspect closely and measure thickness before deciding the car can go.
Can I drive to the track if my brake rotors have cracks or warping?
Cracks are a no-go, and warping that causes pedal pulsation or steering wheel shake should be treated as a stop sign until verified. If the vibration gets worse as braking heat builds, the rotor is not a safe choice for track use. Fix the issue first, then reassess.