How to Measure Brake Rotor Thickness at Home
Measure the rotor at several points with a brake disc micrometer or vernier caliper, then compare the thinnest reading to the stamped MIN TH. If it is at or below that number, replace it. A bad reading can hide a cracked, overheated, or too-thin rotor that is unsafe on the street and poor prep for track use. This guide covers tool setup, the measuring steps, and how to judge wear, taper, and next steps.
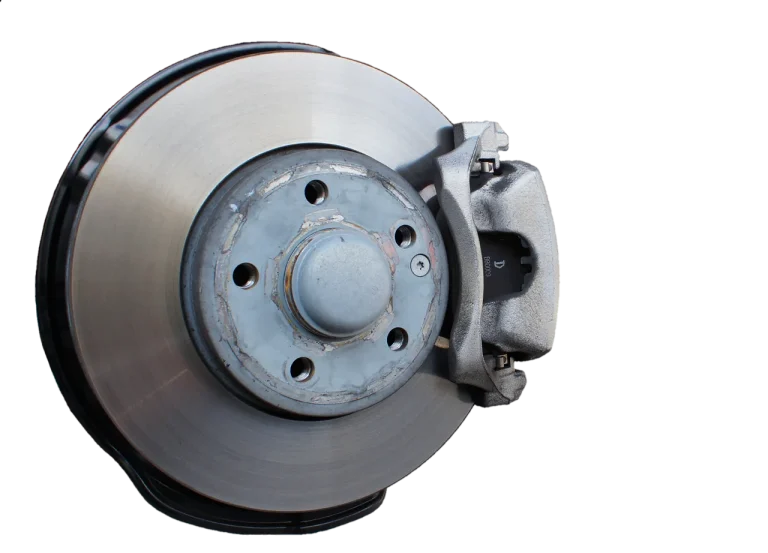
Brake rotor thickness basics
Every rotor has a discard specification. It is often stamped as MIN TH on the rotor edge or the center bell face, and the exact marking can vary by vehicle and rotor type. It is the replacement limit, not a target. Once a measurement reaches that limit, the rotor is done.
Thin rotors matter for more than inspection paperwork. A worn rotor can leave less material to absorb and shed heat. That raises fade risk and can contribute to brake caliper piston over-extension, poor pedal feel, seal damage, and leakage if the rotor gets too thin.
What MIN TH means
MIN TH is the manufacturer’s discard spec. It is not a “still okay” estimate and it is not the same as a visual wear guess. If a rotor is below MIN TH anywhere in the swept path, replace it rather than measuring again and hoping for a better number.
The number may be stamped on the outer circumference edge or the hub face. On some rotors it is easy to spot; on others you may need to turn the wheel or clean light rust off the visible face to read it.
What you’ll need
- Brake disc micrometer with pointed anvils
- Vernier caliper if a micrometer is not available, but only as a backup
- Wheel brace or socket to remove the wheel if needed
- Jack and jack stands, or a lift with proper support
- Torque wrench for wheel lug nuts
- Dial gauge for runout checks
- Brake cleaner and a clean rag
- Notebook or the worksheet below
Measure the rotor inside the swept path with the wheel off, using a micrometer that reaches the friction surface without riding over the lip. Take several readings around the rotor, then compare the thinnest reading to MIN TH. That is the check that decides replacement.
Park and secure the car. Work on level ground, chock the wheels, and let the brakes cool before you measure. A hot rotor can change size enough to blur a close call.
Expose the rotor edge. Remove the wheel if the lip, rust, or spoke design blocks access. Clean loose rust and dust from the swept area with brake cleaner and a rag so the tool sits on metal, not scale.
Find the stamped MIN TH. Read the rotor edge or hub face and write the number on your worksheet.
Zero the micrometer. Close the brake disc micrometer on a flat reference if the tool needs calibration. Use the pointed anvils to reach the friction surface inside the swept path, away from the lip.
Measure at eight points. Take readings around the circumference at roughly 15mm inward from the outer edge. Keep the tool square to the disc face and record every number. That catches taper and wear spots.
Repeat on the other side. Measure the opposite rotor on the axle the same way. Left-right spread helps you spot a brake issue, a hub issue, or one rotor that is wearing faster than the other.
Check runout separately.
Where to measure on the rotor
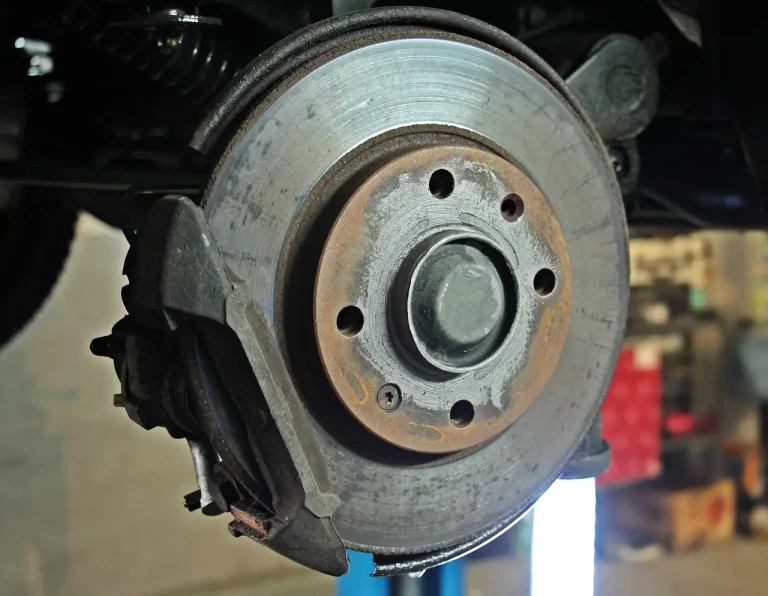
Measure inside the swept path, not on the lip, not on rust scale, and not on the outer edge. The raised lip is a wear clue, but it does not tell you whether the rotor is safe. Calipers can bridge that lip and read falsely high, which is why the micrometer is preferred.
Take readings about 15mm inward from the outer edge. That keeps the anvils on the working surface and avoids the shoulder that can hide wear. If the face is grooved or heat-checked, move the contact points slightly but stay inside the swept path and away from obvious damage.
Why the lip can mislead you
A rotor lip forms as the pad wears the middle of the disc more than the edge. That edge can make a rotor look thicker than it is. A visual check alone cannot prove the disc is above minimum thickness, especially on rotors with a deep lip.
Suppose a rotor has a strong outer lip and a caliper reading that looks healthy. If the caliper bridges the lip, the number can look fine while the actual swept area is already too thin. The micrometer avoids that false reading.
How to read the result
The thinnest reading decides the rotor’s status. If any single measurement is at or below MIN TH, the rotor is finished. Then compare the numbers across the disc to see whether the rotor is wearing evenly or showing disc thickness variation.
Compare to MIN TH
Use the lowest value, not the average, as the pass or fail number. A rotor with seven acceptable readings and one low spot still fails. That low spot is what the pad sees under braking.
Check left-right axle spread
A large difference between left and right sides can point to a drag problem, a caliper issue, or past overheating on one side. Compare the two rotors on the same axle, then inspect pad wear and hardware if the spread looks unusual.
Estimate DTV from your notes
Disc thickness variation is the difference between the thickest and thinnest points on the rotor. It is measured with the micrometer, and it is linked to brake judder or pulsation. Compare your result with the vehicle-specific service data if you have it.
If your notes show a wide spread but the rotor is still above MIN TH, the rotor may still need replacement for smooth braking. That is a different problem from simple wear. DTV is a thickness problem, while runout is a face-true problem.
Rotor thickness worksheet
| Field | What to record | Pass / fail rule |
|---|---|---|
| Vehicle | Year, make, model, trim | Use the correct service spec for that exact setup |
| Rotor location | LF, RF, LR, RR, or front/rear axle | Match each rotor to the correct axle spec |
| Stamped MIN TH | Exact number stamped on edge or hub face | Any reading at or below this number fails |
| Measurement points | 8 readings at roughly 15mm inward from the outer edge | Use the thinnest value for the decision |
| Average thickness | (Point 1 through Point 8) ÷ 8 | Helpful for notes, not the pass/fail number |
| Min / max spread | Thickest reading minus thinnest reading | Large spread suggests DTV or uneven wear |
| DTV estimate | Max minus min, in mm or inch | Compare to 0.015 mm or 0.001 inch limit |
| Lip presence | None, light, or heavy | Lip does not override MIN TH |
| Runout check | Dial gauge result with lugs torqued | Ideally under 0.002 inch, or 0.05mm |
| Decision | Street OK / replace / track not recommended | Below MIN TH means replace |
Fill-in example layout
Use one row per rotor. A common first-timer mistake is recording only one number per axle. That misses taper and hides the low spot that actually matters.
- Vehicle: __________
- Rotor location: __________
- Stamped MIN TH: __________
- Point 1: __________
- Point 2: __________
- Point 3: __________
- Point 4: __________
- Point 5: __________
- Point 6: __________
- Point 7: __________
- Point 8: __________
- Average: __________
- Min / max spread: __________
- DTV estimate: __________
- Lip present: __________
- Decision: __________
Common mistakes
Most bad checks come from measuring the wrong surface or reading the wrong number. Keep the tool on the swept path, keep rust and dirt out of the reading, and never use the lip as proof that the disc is thick enough.
- Using digital calipers over the lip, which can read falsely high
- Measuring on rust scale or dirt instead of clean metal
- Skipping the stamped MIN TH check
- Confusing runout with thickness loss
- Assuming a rotor with no visible cracks is safe
- Ignoring a heavy lip because the outer edge still looks thick
Rotor wear usually comes from abrasive wear, thermal micro-checking, and heat-cycle fatigue. That means a disc can thin out, crack, or go out of true without looking disastrous from ten feet away. Visual checks matter, but they do not replace the micrometer.
For example, a front rotor might measure about 26.4 mm at seven points and about 25.1 mm at one point, while the stamped minimum is about 25.0 mm. That rotor barely passes by thickness, but the spread says it deserves a closer look for DTV and runout before a track day.
If that did not work, try this next: remeasure with the wheel mounted, lug nuts torqued to spec, and the dial gauge on the hub face to separate rotor thickness loss from hub-induced runout or pad transfer. If the disc is still within thickness but the pedal pulsates, the problem may be runout or pad deposition rather than wear alone.
For track-day readiness, use the most conservative rule in your notes. If a rotor is near MIN TH, shows a strong lip, has visible heat checking, or has a large DTV spread, replace it before hard use. On a car with mixed front-to-back wear, check the service manual and compare left-right axle thickness deltas before you decide the rotor is ready.
Prevention is simple: measure before the season, after any brake noise complaint, and after any heat-heavy event. A fresh measurement log makes the next check faster and gives you a clear baseline for wear rate.
Frequently asked questions
How do I measure brake rotor thickness at home?
Use a brake disc micrometer and take eight readings around the rotor about 15mm inward from the outer edge. Record the thinnest reading, then compare it to the stamped MIN TH. If any point is at or below the limit, replace the rotor.
Can I use calipers to measure brake rotor thickness?
Only as a rough backup. Calipers can bridge the outer lip and read falsely high on worn rotors, so they are not the best choice for a decision that depends on a close minimum-thickness number.
Where is the minimum thickness stamped on a brake rotor?
Look on the outer circumference edge or the center bell face, also called the hub face. The stamp may read MIN TH. If you cannot see it easily, clean the area and rotate the rotor until the mark appears.
How many points should I measure on a brake rotor?
Measure at eight points around the circumference. That pattern helps catch taper and localized wear that a single reading can miss. Keep the points roughly 15mm inward from the outer edge and write every number down.
What is disc thickness variation and how do I check it?
DTV is the difference between the thickest and thinnest points on the rotor. Check it by measuring at multiple points with a micrometer and subtracting the smallest number from the largest. A large spread can cause brake judder or pulsation.
How do I know if my rotors are too thin before a track day?
Compare the thinnest measurement to MIN TH, then inspect for cracks, grooves, and heavy heat checking. If the rotor is near the limit, has large DTV, or shows a strong lip, replace it before hard use rather than hoping it survives another session.