Tire Wear: How to Read It and Fix the Cause
Read tire wear by location and texture: both shoulders often suggest low pressure, center wear often suggests the tread is shallower in the middle than at both shoulders from pressure that was too high, one-edge wear can point to camber or toe, and feathering or cupping can point to alignment or damping problems. Misread it, and you can waste a track day, cord an expensive tire early, or chase setup changes that make grip and braking worse. This guide maps each common wear pattern to the most likely cause, separates normal track abrasion from faults, and sets the next checks in priority order.
What tire wear is normal on track?
Normal track wear usually shows up as faster shoulder abrasion, mild rollover onto the outer tread blocks, and a clear difference between the loaded outside tire and the less-worked mate on the same axle. It becomes a fault when wear is sharply localized, repeats after pressure correction, or comes with feathering, cupping, vibration, pull, cords, or chunking.
Expected shoulder abrasion versus true edge wear
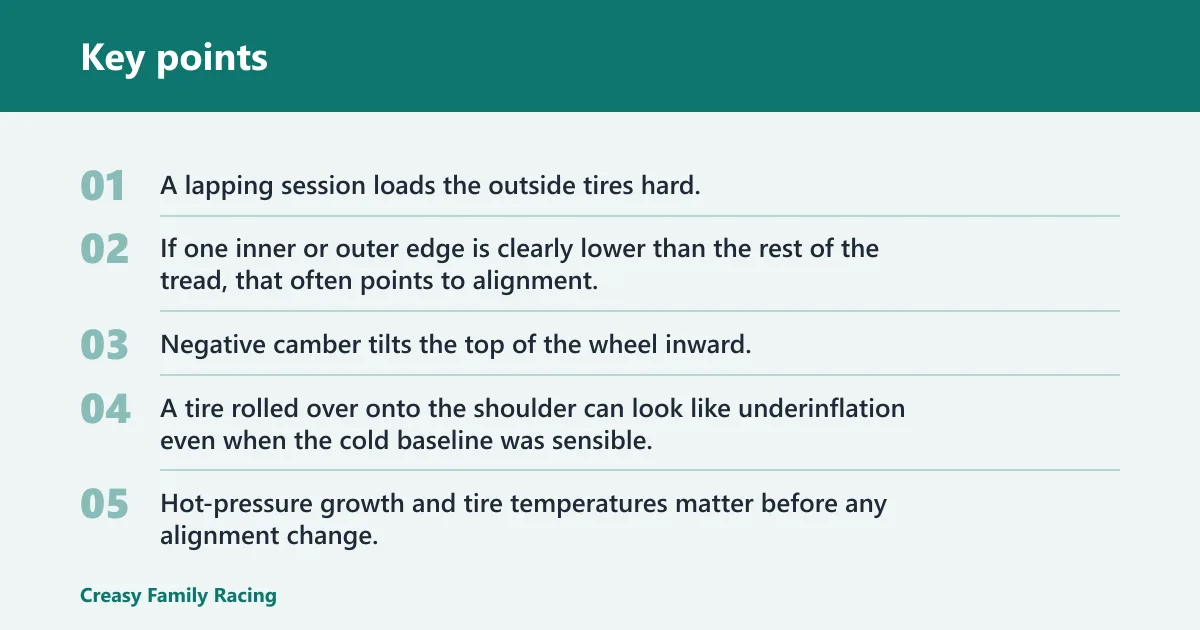
A lapping session loads the outside tires hard. On a street-aligned car, that often means the outer shoulder looks worked over after a day on track, especially on the front axle. That can be normal surface abrasion rather than proof of bad alignment.
True edge wear is more specific. If one inner or outer edge is clearly lower than the rest of the tread, that often points to alignment. A tire’s wear pattern can indicate alignment, inflation, suspension, or balance issues, but the pattern only makes sense in context.
When aggressive camber makes wear look worse than it
Negative camber tilts the top of the wheel inward. A track setup with extra negative camber can make the inner shoulder wear faster on the street and can leave the inside blocks looking more used than the center. That is not automatically a defect.
If both front tires show similar inner-shoulder loss and the car is known to run aggressive front camber, start by asking whether the wear matches the setup. If only one tire is much worse, or the wear is paired with feathering, bent-part symptoms, or a ride-height change, stop calling it “just camber.”
Heat, rollover, and abrasion that are warnings
Track use can mimic pressure wear. A tire rolled over onto the shoulder can look like underinflation even when the cold baseline was sensible. Hot-pressure growth and tire temperatures matter before any alignment change.
Picture a front-wheel-drive car on 235/40R18 tires that finishes a session with heavy outer-block scrub on both fronts, but the inner and center grooves still measure close. That points first to support and rollover under cornering load, not straight to a bent suspension arm.
Warning signs are different: cords near one edge, a sawtooth feel across the tread, repeating cupping, or one tire on an axle wearing far faster than the other. Those patterns usually deserve a fault search before the next event.
How do you inspect tire wear correctly?
Inspect tire wear by measuring tread depth at the inner shoulder, the center rib area, and the outer shoulder, in several grooves on each tire, recording the lowest reading, then comparing left to right on the same axle. After that, read the wear bars, inspect the sidewalls and tread face for damage, and note whether the pattern is limited to one tire or shared across an axle.
Use a tread depth gauge the same way every time
- Check cold first. Start before driving so cold tire pressure can be compared with the driver’s side door sticker or the owner’s manual. The recommended pressure is on the driver’s side door sticker, not the tire sidewall, and that baseline helps separate street-pressure error from track-use heat effects.
- Measure three positions. Use a tread depth gauge at the inner, center, and outer tread positions. Check several grooves at each position, including both shoulders and at least one central groove, because the lowest reading tells you more than a single spot check.
- Record the lowest reading. Write down the smallest value found on each tire rather than an average. That exposes a single edge or block row that is disappearing faster than the rest.
- Compare side to side. Compare both tires on the same axle first, then compare front axle to rear. One tire wearing differently from its mate often points to a corner-specific issue rather than a whole-car setup choice.
- Feel the tread face. Run a hand lightly across the tread blocks in both directions. A smooth pass one way and a sharp pass the other is feathering, which often tracks back to toe scrub.
Read wear bars and replacement-level tread
Tread wear bars are small raised bits of rubber between tread blocks. Wear indicators are set at 1.6 mm in the main grooves, so when the tread is level with those bars, replacement time has arrived even if the wear pattern still points to a fixable cause.
That distinction matters on track cars. Alignment can stop repeat damage, but it cannot put rubber back on the tire. If the bars are flush on one edge, the cause still needs diagnosis, yet the tire may already be done.
Check damage beyond the wear pattern
Look for cords showing through the tread, sidewall bulges, cuts in the tread or sidewall, age cracks, torn or chunked tread blocks, punctures, and stones, screws, or other debris stuck in the grooves or carcass. A worn tire can reduce wet-road grip and increase aquaplaning risk, so a track tire that still “looks fine” on top can be a poor road tire if the grooves are near the bars or the shoulders are badly torn.
Many manufacturers advise inspection after about five years and replacement around ten years. Age does not explain a feathered tread or one-edge scrub, but it can change the replace-or-monitor decision.
Tire wear diagnosis table
| Wear pattern | Likely cause | Confidence level | Quick check | Expected on track? | Next action |
|---|---|---|---|---|---|
| Inside edge wear | Negative camber, toe-out, ride-height change, sagging spring, bent arm or knuckle | Medium on both sides, high on one tire only | Measure inner/center/outer, compare left to right, check steering wheel center and ride height | Sometimes, especially with aggressive front camber | Confirm cold pressure and hot spread, then check alignment with camber and toe values; inspect corner hardware if one tire is much worse |
| Outside edge wear | Underinflation, insufficient camber for track load, tire rollover, toe error | Medium | Look for shoulder scrub on both outer fronts, compare center depth, review hot pressures | Often, on street-aligned cars used hard | Set cold baseline, review hot pressures and temperatures if available, then decide whether pressure, driving line, or added camber is the right change |
| Center wear | Overinflation | High on street use, medium after track heat cycles | Center lower than both shoulders across the tire | Sometimes mimicked by excessive hot pressure | Recheck cold baseline against placard or manual, review how much pressure rose on track, reduce target hot pressure rather than guessing at alignment |
| Feathering | Toe misalignment, tread scrub from toe change under load | High | Feel blocks: smooth one direction, sharp the other | Rare as a normal pattern | Check toe first; inspect tie rods, bushings, and anything that lets toe move |
| Cupping or scalloping | Worn shocks or struts, wheel imbalance, loose suspension parts | High when paired with vibration or bounce | Look for repeated dips around the circumference; note speed vibration | No, not as a healthy pattern | Inspect damping parts and suspension joints, then balance the wheel before fitting replacements |
| Diagonal or patchy wear | Wheel balance, runout, intermittent contact from damping problem, brake drag on one corner | Medium | Check for vibration at speed, localized hot spots, and one-corner braking drag | Usually no | Balance the assembly, inspect for bent wheel or runout, and check the affected corner for damping or brake issues |
| One tire only versus both sides | One tire only: corner fault, bent part, brake drag, local toe change. Both sides: pressure, setup, axle alignment trend | High | Compare matching axle tires, then compare front axle to rear | Both sides can be normal; one tire only usually is not | Treat one-tire wear as a corner-specific inspection, and shared axle wear as pressure/setup/alignment analysis |
How do you read the pattern before changing anything?
Read the pattern in this order: first ask whether one tire or both on the axle show it, then identify where the tread is losing depth, then identify texture such as feathering or cupping. Only after that should pressure, setup limits, and alignment be considered, because the same visual wear can come from track load or from a mechanical fault.
Start with one tire versus an axle pair
If both front tires show similar outer-shoulder abrasion after a clockwise-heavy track day, that can be expected. If the left-front alone is chewed through the inner edge while the right-front is normal, suspect that corner first.
Wear on just one inner or outer edge often points to an alignment problem. On a track car, that may mean static toe or camber is wrong, or that a component has moved and changed dynamic alignment under load.
Separate location from texture
Location tells you where the load is concentrated. Texture tells you how the tire is being scrubbed or bounced. Center wear and edge wear are location patterns. Feathering, cupping, and diagonal wear are texture patterns.
A common first-timer mistake is treating all ugly shoulders as “alignment.” If the shoulder is simply abraded and the blocks stay even, pressure and support come before alignment. If the blocks feel sawtoothed, toe jumps much higher on the list.
Account for setup constraints
Staggered fitments, directional tread, and side-specific tires limit rotation options. That matters because front-to-rear differences may reflect job assignment, not a fault. Front tires on a heavy-braking, front-drive track car often age faster even when nothing is wrong.
Track temperatures help too if available. A tire that wears the outer shoulder and also runs much hotter there suggests rollover and support limits. A tire that wears one edge with no matching heat story leans harder toward alignment.
What does inside or outside edge wear mean?
Inside or outside edge wear means the tire is spending too much time loaded on one shoulder, but the reason differs by pattern. Inner edge wear often points to camber or toe, outside edge wear often points to pressure or support limits on track, and both shoulders worn together usually indicate low pressure rather than alignment.
Inner edge wear
Negative camber can create inner-shoulder wear by design. Toe-out can accelerate that wear because the tire is both tilted and scrubbed. Camber is the inward or outward tilt of the wheel, while toe is the direction the tires point relative to the car’s centerline; they leave different fingerprints.
If both tires on an axle show mild, even inner-shoulder preference and the car has track-friendly camber, that may be expected. If one tire shows severe inner-edge loss, think bent or sagging hardware, a ride-height change, or toe that has moved.
Suppose a rear tire shows inner-edge wear only on the right side after the car clipped a curb. That is less likely to be “normal negative camber” and more likely to be a single-corner alignment or bent-component issue.
Outer edge wear
Both outer shoulders worn with more tread left in the center usually means low pressure. On track, though, outside-edge wear can also reflect a street alignment, a tall sidewall rolling over, or a tire that got too hot and unsupported in long corners.
What causes tires to wear on the outside edge? Usually one of three things: cold pressure too low, not enough negative camber for the load, or toe/cornering scrub concentrated on that shoulder. If both fronts show it similarly, setup is more likely than damage.
Both shoulders worn together
Both outer edges worn with a deeper center indicates underinflation, while center wear with deep edges indicates overinflation. Those are still useful patterns on track cars, but they should be checked against the cold baseline and the hot-pressure rise before any conclusion is locked in.
What causes center wear, feathering, cupping, or patchy wear?
Center wear usually points to pressure too high, feathering usually points to toe scrub, cupping usually points to worn damping or imbalance, and diagonal or patchy wear usually points to balance, runout, or a corner-specific contact problem. These are distinct patterns, so they should not be bundled into one catch-all diagnosis.
Center wear
What causes center tire wear? The classic answer is overinflation. If the center ribs or center groove area measure less tread depth than both shoulders across the same tire, pressure is the lead suspect because the crown carried too much of the load.
Track use adds one caveat: a sensible cold setting can still produce center-favoring wear if hot pressure climbs too far in session. That is why the cold baseline comes first, then the hot spread, then the wear read.
Feathering or sawtooth wear
Toe misalignment is a likely cause of feathering wear. This feels like the tread blocks are smooth one way and sharp the other.
Toe commonly drifts out of spec from curb strikes, worn joints, or changes in ride height. It also scrubs tread off an edge faster than camber alone, because the tire is dragged sideways as it rolls.
Cupping, scalloping, and diagonal wear
Cupped or scalloped wear points to worn suspension or imbalance. Bad shocks or struts can let the tire bounce instead of staying planted, and that repeated contact pattern leaves hollows around the circumference.
Wheel balance overlaps here. An out-of-balance assembly can cause diagonal or patchy wear and may create vibration at speed. That vibration clue matters, balance and damping faults often announce themselves before the tread is obviously ruined.
When is it pressure versus alignment?
Pressure should be checked first because it changes tread loading immediately, while alignment is the root-cause fix only after pressure and setup effects have been separated. If the wear is shared across an axle and matches center or both-shoulder patterns, pressure leads. If it is one-sided or feathered, alignment rises fast.
Cold pressure is the baseline
Cold tire pressure is checked before driving. Compare it with the door-jamb placard or owner’s manual for the street baseline, because the sidewall marking is not the vehicle recommendation.
That does not mean the placard is the final track setting. It means it is the honest starting point for diagnosis. Without a known cold baseline, center wear and shoulder wear are easy to misread.
Use hot-pressure spread and temperatures carefully
After a session, note how much pressure changed and whether one axle or one corner rose more than the others. If tire temperatures are available, use them to support the wear story, not replace it.
Say your front tires start from the same cold pressure, but one front comes in much hotter with heavier outer-shoulder abrasion while the rear axle looks even. That favors a front support or setup issue over a whole-car pressure mistake.
Alignment fixes the cause, not the damage
Wheel alignment is where camber and toe become numbers instead of guesses. One-edge wear and feathering often point there, but alignment corrects the cause, not the tread already lost. If the tire is near the bars on one shoulder, the alignment can save the replacement set, not the current one.
Which chassis faults keep repeating the wear?
Repeated wear after pressure correction usually means a chassis issue is still present. Camber and toe are the first alignment angles to inspect, then shocks and struts, bushings, and wheel balance. One-corner repetition is especially suspicious because normal setup choices usually affect both tires on the same axle in a similar way.
Alignment angles that matter most
Camber sets how the tread loads in cornering. Toe sets how the tire scrubs as it rolls. In practice, toe often destroys tires faster, while camber shapes where the wear appears.
If a car suddenly starts wearing one edge after it previously looked stable, do not assume the setup “just got more aggressive.” Ride-height changes, sagging springs, shifted subframes, or bent links can alter camber and toe enough to repeat the pattern every event.
Shocks, struts, and suspension joints
Can bad shocks or struts cause uneven tire wear? Yes. Worn damping parts can create cupping or scalloping, especially when paired with weak bushings, loose joints, or a wheel assembly that is also out of balance.
Replace or repair those faults before fitting new tires, or the new set will repeat the old pattern. If only one tire cups, inspect that corner first rather than treating it as an all-four alignment issue.
Balance, runout, and brake drag
Wheel balance belongs in the diagnosis whenever there is speed vibration, diagonal wear, or patchy tread loss. A bent wheel or excessive runout can also drive an irregular contact pattern.
Brake drag is another one-tire-only clue. If one wheel runs unusually hot and the wear is localized, add caliper and bearing checks before changing alignment settings.
How do you fix the cause without chasing the wear?
Fix the cause by checking in a strict order: establish cold pressure, review hot-pressure growth, confirm setup constraints such as directional or staggered fitment, then inspect alignment, balance, and suspension. That sequence keeps normal track abrasion from being mistaken for a chassis fault and keeps true mechanical faults from being blamed on setup.
Use this check order before the next event
- Set cold baseline. Check all four tires cold and compare with the placard or owner’s manual street baseline. Wrong pressure can create center or edge wear, so this has to be known before any deeper diagnosis.
- Log post-session spread. After each session, write down hot pressures and note which axle or corner rose most. That helps separate a pressure-management issue from a static alignment issue.
- Confirm tire constraints. Note whether the car uses staggered sizes, directional tread, or side-specific construction. If rotation or side swapping is limited, uneven front-to-rear aging may be expected and should not be treated as proof of a fault.
- Measure tread positions. Use the tread depth gauge across inner, center, and outer positions, in multiple grooves on each tire, and record the lowest reading on each tire. Compare the two tires on the same axle before comparing front to rear.
- Inspect texture and damage. Feel for feathering, look for cupping, and check for visible cords, bulges, cracks, cuts, torn tread blocks, punctures, and debris lodged in the tread. Severe damage changes the decision from monitor to replace now.
- Align and inspect hardware. If the pattern is one-sided, feathered, or repeated after pressure correction, inspect camber and toe plus shocks, struts, bushings, and any bent or loose parts. Balance the wheel if vibration, patchiness, or diagonal wear is present.
Adjust setup versus repair faults
Setup changes are for expected track wear: a small pressure adjustment, more support for rollover, or more camber when both tires on an axle tell the same story. Repairs are for asymmetry, feathering, cupping, vibration, pull, or recurring one-corner wear.
How do I fix inner tire wear? First identify whether the inner wear is shared and expected from camber, or isolated and accelerated by toe or damage. The fix may be pressure management, a camber change, a toe correction, or hardware repair.
Replace now, inspect now, or monitor
Replace now if tread is level with the wear bars, if cords are visible, if a bulge or sidewall cut is present, or if chunking is severe. Inspect now if there is vibration, pull, a sudden one-tire change, or recurring cupping. Monitor to the next session only when the wear is mild, understood, and measured against a corrected baseline.
Frequently asked questions
How do I read tire wear patterns?
Start with where the wear is, then how it feels. Both shoulders usually point to low pressure, center wear to high pressure, one-edge wear to camber or toe, feathering to toe scrub, and cupping to damping or balance. On track, always ask whether both tires on the axle show the same story.
What does inner edge tire wear mean?
Inner edge wear often means negative camber, toe-out, or a corner that has moved out of alignment. If both tires on an axle show similar inner-shoulder wear, setup may be the reason. If one tire is much worse, inspect that corner for toe change, bent parts, or ride-height issues.
What causes tires to wear on the outside edge?
Outside edge wear usually comes from low support at the shoulder: underinflation, too little negative camber for track loads, or rollover in long corners. If both fronts show it, pressure and setup are the first checks. If one tire alone shows it, alignment or a corner-specific fault moves higher.
What causes center tire wear?
Center wear usually points to overinflation. If the center is lower than both shoulders, pressure is the lead suspect. On track cars, a correct cold setting can still end up too high when hot, so compare the wear pattern with cold baseline pressure and the pressure rise after sessions.
Can bad shocks or struts cause uneven tire wear?
Yes. Worn shocks or struts can cause cupping or scalloping because the tire loses steady contact and bounces over the surface. That pattern often overlaps with wheel balance issues, so vibration, repeated hollows around the tire, and one-corner-only wear should trigger both suspension and balance checks.
When does uneven wear mean alignment versus pressure?
Pressure leads when the pattern is shared across an axle and matches center wear or both-shoulder wear. Alignment leads when the wear is one-sided, one-tire-only, or feathered. The clean sequence is cold pressure first, then hot-pressure spread, then alignment angles, with camber and toe at the top of the list.